How to Make Clay Toys at Home Easy Projects for Kids and Adults
Creating and molding clay toys at home can be a delightful activity for both kids and adults, fostering creativity and enhancing fine motor skills. Renowned clay artist and educator, Emily Thompson, once remarked, "Clay toys are not just playthings; they are a gateway to imagination and artistic expression." This sentiment captures the essence of why engaging in clay toy projects is both beneficial and enjoyable.
For families looking to spend quality time together, making clay toys provides an opportunity to explore creativity without the constraints of a formal art setting. Whether it's sculpting whimsical characters or functional items, the process is rewarding and can lead to unique, personalized creations. Moreover, clay's malleability allows for endless possibilities, encouraging experimentation and innovation—qualities essential for both children and adults alike.
As we delve into some easy projects that anyone can try at home, remember that the joy of crafting clay toys resides in the journey, not just the final result. Embrace the messiness of creativity, and let your imagination run wild as you discover the fun and fulfillment that comes with creating your own clay toys.
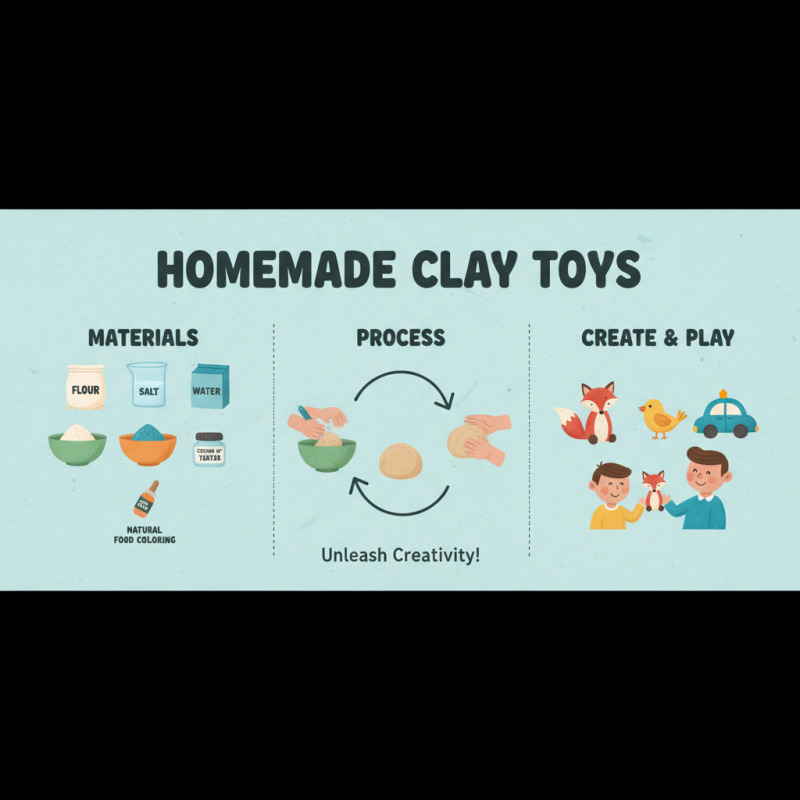
Materials Needed for DIY Clay Toys at Home
Making clay toys at home is a delightful activity that can inspire creativity in both kids and adults. The first step in this fun project is gathering the right materials. For a basic homemade clay, you will need flour, salt, water, and cream of tartar. These ingredients mix together to form a soft and pliable dough that is perfect for molding into various shapes. Additionally, you can introduce natural food coloring to the dough to create vibrant colors for your toys, making the activity even more engaging.
Once you have your clay ready, consider the tools required for shaping and adding details to your creations. Simple items like rolling pins, cookie cutters, and toothpicks can help you craft intricate designs and textures. For finishing touches, you might want to prepare paints or varnishes to decorate the dried toys. If you prefer a non-toxic option, you can use acrylic paints or homemade tempera paint. With these materials at hand, the possibilities of crafting fun and imaginative clay toys are endless, making it an enjoyable experience for everyone involved.
Basic Techniques for Molding and Shaping Clay
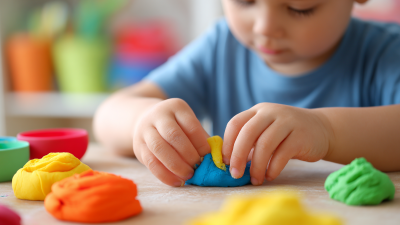
Molding and shaping clay is an enjoyable activity that sparks creativity in both kids and adults. To start, gather your materials: air-dry clay or polymer clay, sculpting tools, and your hands. Begin with kneading the clay to soften it, making it easier to manipulate. Make sure to remove any air bubbles by rolling the clay into a ball and then flattening it. This step ensures a smooth texture, which is vital for achieving the desired shape.
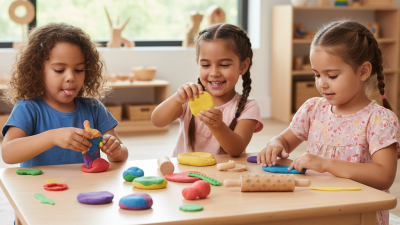
Once you have prepared your clay, consider the basic techniques for molding. Pinching is a simple yet effective method for shaping small figures or animals. By using your thumb and forefinger, you can create detailed features. Rolling is another fundamental technique where you shape clay into coils or sheets, which can then be combined to form more complex structures. Don't be afraid to experiment with cutting and carving tools to add texture or intricate designs to your creations. Remember, there are no strict rules in clay crafting—let your imagination guide you as you explore different shapes and forms.
Popularity of Clay Toy Projects
Creating Simple Clay Toys: Step-by-Step Projects
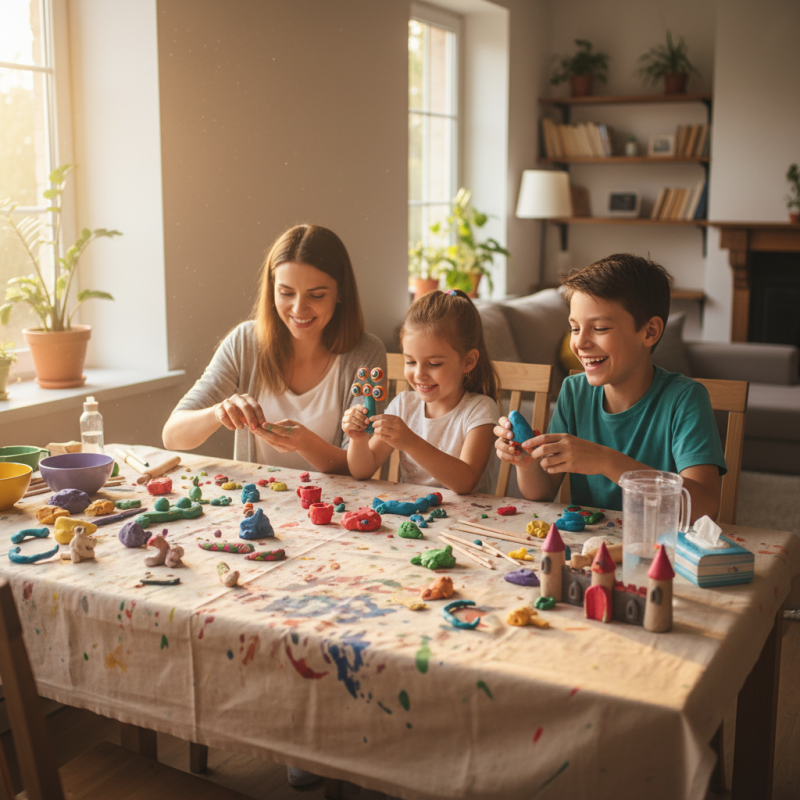
Creating simple clay toys can be a rewarding activity for both kids and adults, fostering creativity and fine motor skills. According to a report by the American Academy of Pediatrics, engaging in hands-on activities such as crafting with clay can significantly enhance children's developmental growth.
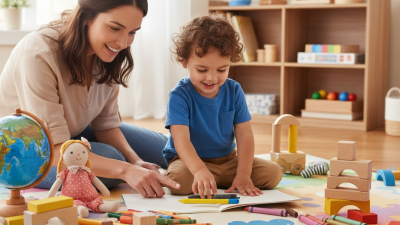
Working with clay not only encourages imaginative play but also allows children to express their ideas visually without the constraints of digital distractions. Adults can benefit from these activities as well, as studies have shown that engaging in creative hobbies can reduce stress and improve overall mental well-being.
One easy project to start with is making clay animals. To begin, shape a small ball of clay into a rounded body and then add smaller pieces for legs and a head. Using simple tools like toothpicks or household items can help add details like eyes and texture. This project can be a great introduction to basic sculpting techniques, allowing participants to experiment with shapes and colors. By following step-by-step instructions, as outlined in various educational resources, individuals can not only learn how to create specific toys but also gain the confidence to explore more complex projects as their skills develop.
As families spend more time at home, crafting together can provide a constructive outlet for energy and imagination. A survey by the Craft and Hobby Association found that 62% of parents intend to engage their children in more crafting activities, reinforcing the idea that making clay toys is not just fun, but also a valuable educational experience. These projects can nurture bonds between family members while cultivating a sense of accomplishment in creating something unique and tangible.
Tips for Painting and Finishing Your Clay Toys
When it comes to painting and finishing your clay toys, there are several techniques that can enhance the overall look and feel of your creations.
Firstly, it is important to select the right type of paint for your clay.
Acrylic paint is often the preferred choice due to its vibrant colors and quick-drying properties.
Before starting, ensure that your clay toys are thoroughly dried and sanded if necessary for a smooth surface.
This will help the paint adhere better and create a more polished finish.
Once you’ve painted your toys, consider applying a sealant.
This step not only protects your artwork but also adds a professional touch.
There are various sealants available, including sprays and brush-on coatings.
When applying the sealant, be sure to follow the manufacturer's instructions for the best results.
Allow each layer to dry fully before adding more coats or shifting to another part of your project.
With these tips in mind, you can create beautifully painted and finished clay toys that showcase your artistic flair.
Safe Storage and Care for Your Homemade Clay Creations
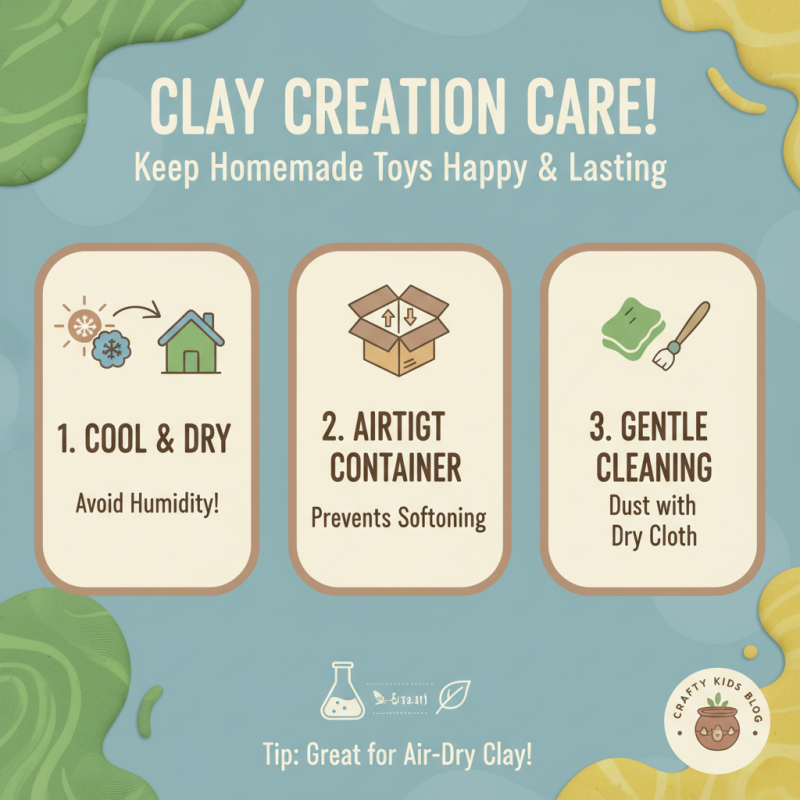
When it comes to making clay toys at home, understanding the proper storage and care for your creations is crucial. Homemade clay projects, often made from natural materials or non-toxic alternatives, can last for a long time if they are stored correctly. According to a report from the American Society for Testing and Materials, air-dry clay can be particularly sensitive to humidity; therefore, it’s essential to keep your clay toys in a cool, dry place to prevent them from becoming too soft or warped.
Tips for maintaining your clay creations include sealing them properly if you've used paint or glaze. A water-based sealant can help protect your toys from moisture and dust. Additionally, avoid exposing your clay toys to extreme temperatures. For instance, leaving them in direct sunlight or in a damp environment can lead to deterioration over time. Instead, consider using a breathable cloth or box to protect them from dust while allowing for air circulation.
Furthermore, regular inspections of your clay toys can help you identify any signs of wear or damage early on. If you notice cracks or chips, patching them up with a bit of extra clay can extend their life. According to the National Art Education Association, engaging in creative activities such as clay modeling not only fosters artistic skills but also encourages care and attention to detail – skills that are vital for the preservation of your handmade projects.